
I’ll be honest — this recipe came to me on one of those quiet afternoons when I didn’t really plan to bake anything. You know those days where you’re just sort of wandering through the kitchen, opening cabinets, not sure what you’re looking for? That was me. I found a box of puff pastry sitting in the freezer, the kind I swore I’d use “one day.” And tucked way in the back of the pantry was a can of cherry pie filling — probably from some pie I never made. I just kind of laughed to myself, pulled them both out, and thought, alright, let’s do this.
There’s something kind of peaceful about baking when you’re not trying to impress anyone. No timers blaring, no fancy equipment, no rushing. Just rolling out pastry, hearing the soft sound of flour against the counter, smelling that buttery air when the oven warms up. I think that’s why I love this recipe — it’s not fussy. It’s just simple, comforting, and a little messy in all the best ways.
The first time I made these, I remember my kitchen looked like a cherry explosion. Filling on the counter, glaze dripping everywhere, and me standing there, licking icing off my finger and laughing because it all felt… good. Real. Not perfect, not staged, but warm and sweet and kind of nostalgic. Like the kind of baking your grandma might’ve done, when she didn’t measure everything perfectly but it somehow always turned out right anyway.
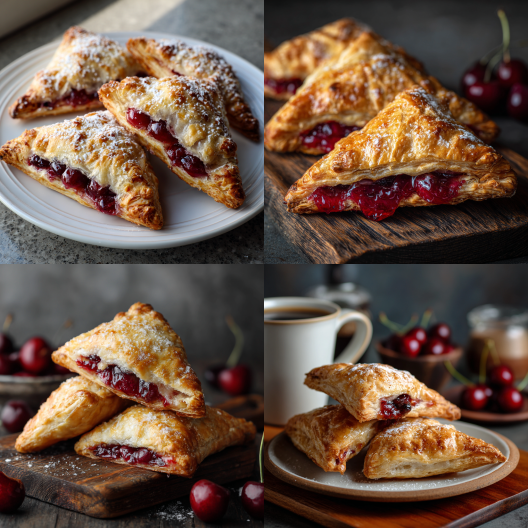
These turnovers are buttery and flaky, with that little burst of cherry that reminds you of summer even if it’s snowing outside. They taste best warm — like really warm, just enough so the filling is still gooey and the glaze melts a little when it touches the pastry.
And here’s the truth: nobody’s ever made these and regretted it. They’re the kind of treat that makes people smile without even realizing they’re smiling. And maybe that’s the whole point of baking sometimes — to make something small that brings a bit of happiness, even if it’s just to yourself.
Ingredients
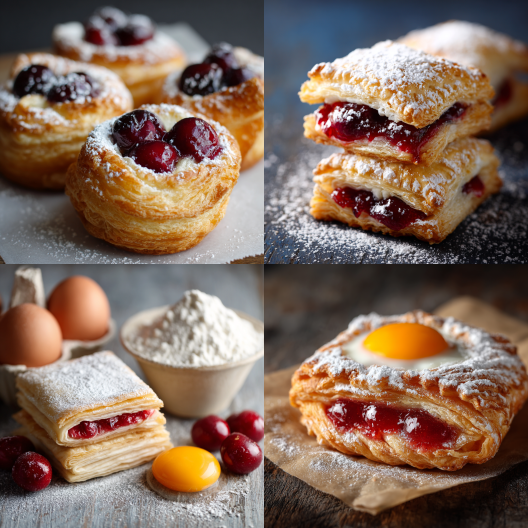
1 package puff pastry (2 sheets)
1 cup fresh or canned cherry pie filling
1 egg (for egg wash)
1 tablespoon milk (for egg wash)
1 cup powdered sugar
1 teaspoon vanilla extract
2–3 tablespoons milk (for glaze)
Directions
- Preheat your oven to **400°F (200°C).
- Thaw your puff pastry — don’t rush it, it needs to be soft but still cool. Roll it out gently on a floured counter.
- Cut each sheet into 4 squares — doesn’t have to be perfect, trust me.
- Spoon about 1–2 tablespoons of cherry filling into the middle of each one. Don’t overdo it or it’ll leak out (and even if it does, it’ll still taste amazing).
- Fold each square into a triangle, press the edges to seal, and crimp them with a fork. That little pattern on the edge? It’s not just pretty — it keeps the filling in place.
- Mix your egg and milk, then brush that over the tops. It gives them that golden, bakery-style shine.
- Pop them on a parchment-lined baking tray and bake for 15–20 minutes, or until they puff up and turn beautifully golden.
- While they’re baking, whisk powdered sugar, milk, and vanilla for the glaze. Adjust it until it’s pourable but not watery.
- Once the turnovers cool just a bit, drizzle the glaze over the top. Don’t worry if it runs down the sides — that’s the best part.
Recipe FAQs
- Can I use something besides cherry pie filling?
This recipe is a good base for almost anything fruity — blueberry, apple, raspberry, even Nutella if you’re in that kind of mood. I’ve even done half cherry, half cream cheese once, and it was ridiculous in the best way. Just keep an eye on the moisture — too much juice will make the pastry soggy. - My turnovers always leak in the oven. Why?
Yeah, that happens sometimes. Usually it’s from overfilling or not sealing the edges tightly enough. Don’t sweat it though — those little leaks end up caramelizing into these chewy, crispy bits that are honestly delicious. Half the time, I kind of like it when that happens. - Can I make these ahead of time?
Definitely. You can assemble them, freeze them raw on a tray, then transfer them to a freezer bag. When you’re ready, bake them straight from frozen — just add about five minutes to the bake time. It’s actually kind of nice having a stash of these in the freezer for lazy mornings or surprise guests. - How long do they last once baked?
They’re best the day you make them nothing beats that fresh, flaky crunch. But if you have leftovers, just store them in an airtight container at room temperature for a day or two. Reheat in the oven for a few minutes to bring them back to life. Don’t use the microwave — it’ll make them sad and soggy. - Can I skip the glaze? Or do something different with it?
You totally can. Sometimes I don’t even bother with the glaze if I’m going for something less sweet. But when I do make it, I’ll sometimes add a tiny squeeze of lemon juice instead of vanilla — it gives this nice tang that cuts through the sweetness. Or if you really want to spoil yourself, melt a little white chocolate and drizzle that on top instead. No rules here.
Homemade Cherry Turnovers
4
servings30
minutes40
minutes300
kcalIngredients
1 package puff pastry (2 sheets)
1 cup fresh or canned cherry pie filling
1 egg (for egg wash)
1 tablespoon milk (for egg wash)
1 cup powdered sugar
1 teaspoon vanilla extract
2 –3 tablespoons milk (for glaze)
Directions
- Preheat your oven to **400°F (200°C).
- Thaw your puff pastry — don’t rush it, it needs to be soft but still cool. Roll it out gently on a floured counter.
- Cut each sheet into *4 squares* — doesn’t have to be perfect, trust me.
- Spoon about *1–2 tablespoons* of cherry filling into the middle of each one. Don’t overdo it or it’ll leak out (and even if it does, it’ll still taste amazing).
- Fold each square into a triangle, press the edges to seal, and crimp them with a fork. That little pattern on the edge? It’s not just pretty — it keeps the filling in place.
- Mix your *egg and milk*, then brush that over the tops. It gives them that golden, bakery-style shine.
- Pop them on a parchment-lined baking tray and bake for *15–20 minutes*, or until they puff up and turn beautifully golden.
- While they’re baking, whisk *powdered sugar, milk, and vanilla* for the glaze. Adjust it until it’s pourable but not watery.
- Once the turnovers cool just a bit, drizzle the glaze over the top. Don’t worry if it runs down the sides — that’s the best part.