
🍊 Orange Creamsicle Fudge: A Nostalgic Treat That Melts in Your Mouth 🍦
If you grew up chasing the ice cream truck for that creamy orange popsicle with a vanilla center, then you already know the magic of an Orange Creamsicle. Now imagine that same dreamy flavor—bright citrus and smooth cream—packed into soft, melt-in-your-mouth fudge. That’s exactly what this Orange Creamsicle Fudge recipe delivers!
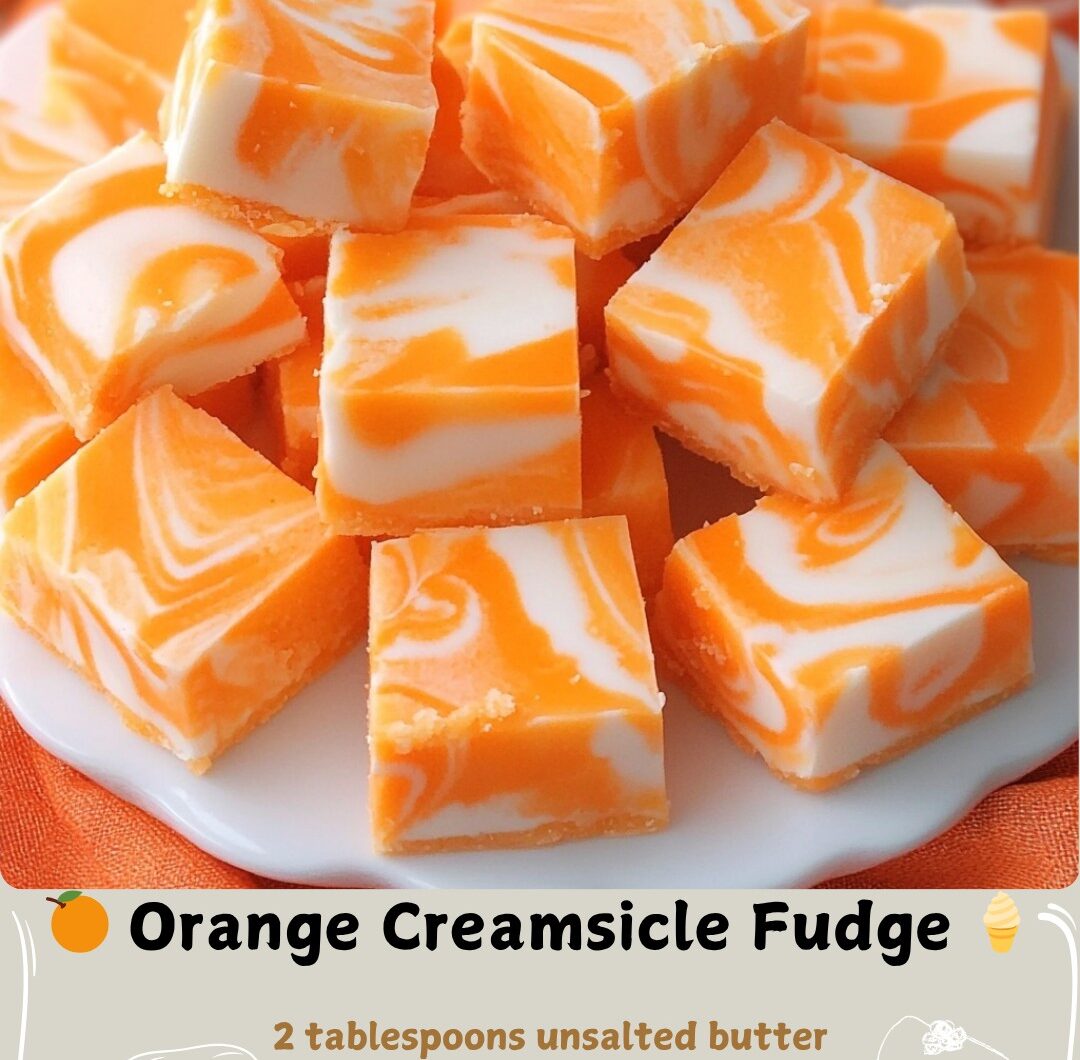
This treat combines the sweetness of white chocolate and vanilla with the zesty tang of orange extract to create a stunning, swirled dessert that’s perfect for parties, holidays, or summer celebrations. Best of all, it’s incredibly easy to make—no candy thermometer required!
🍊 Ingredients You’ll Need
For the Vanilla Layer:
- 3 cups white chocolate chips
- 1 (14-ounce) can sweetened condensed milk
- 2 tablespoons unsalted butter
- 1 teaspoon vanilla extract
- Pinch of salt
For the Orange Layer:
- 3 cups white chocolate chips
- 1 (14-ounce) can sweetened condensed milk
- 2 tablespoons unsalted butter
- 2 teaspoons orange extract
- Orange gel food coloring (optional for a bold color)
🍦 Step-by-Step Instructions
Step 1: Prepare the Pan
Line an 8×8-inch square baking dish with parchment paper, allowing some to hang over the edges. This makes it easy to lift out the fudge later.
Step 2: Make the Vanilla Layer
In a microwave-safe bowl, combine white chocolate chips, sweetened condensed milk, and butter. Microwave in 30-second intervals, stirring well each time until smooth and creamy.
Add vanilla extract and a pinch of salt, then pour into the prepared pan. Smooth the top and set aside.
Step 3: Make the Orange Layer
Clean and dry your bowl. Add the same base ingredients again—white chocolate chips, condensed milk, and butter—and melt using the same process.
Once smooth, stir in orange extract and food coloring to achieve that signature creamsicle hue.
Step 4: Swirl and Chill
Pour the orange mixture over the vanilla base. Using a knife or chopstick, create gentle swirls to form a marbled pattern.
Refrigerate for at least 3–4 hours, or until firm.
Step 5: Slice and Serve
Lift the fudge out using the parchment overhang. Cut into 1-inch squares, and enjoy the creamy, citrusy flavor in every bite!
Store your fudge in an airtight container in the refrigerator for up to 2 weeks.
🍬 Tips for the Perfect Orange Creamsicle Fudge
- Use gel food coloring for the best color without affecting texture.
- Don’t overheat your chocolate—melt it slowly to avoid seizing.
- Add zest – For extra citrus punch, stir in ½ teaspoon of orange zest.
- Gift idea – Wrap fudge squares in wax paper and place in decorative tins for a festive homemade gift.
💡 Why This Recipe Works
Unlike traditional fudge recipes that require careful temperature control, this microwave fudge uses sweetened condensed milk for a foolproof creamy texture. The combination of orange extract and vanilla creates that classic Creamsicle flavor, while the marbled layers make it visually stunning.
Whether you’re new to candy-making or a seasoned pro, this recipe guarantees success—and smiles.
🧁 Frequently Asked Questions (FAQ)
❓ Can I use milk or dark chocolate instead of white chocolate?
Not recommended. White chocolate gives the fudge its creamy, vanilla base and allows the orange color to pop beautifully. Dark or milk chocolate would overpower the citrus flavor.
❓ What can I use if I don’t have orange extract?
You can use orange zest or orange juice concentrate, but note that the flavor will be milder and less intense. Orange extract provides that strong, nostalgic Creamsicle taste.
❓ Do I have to use food coloring?
No, it’s optional! Without it, your fudge will still taste the same—just a little paler. The orange tint simply gives it a bright, fun look.
❓ Can I freeze Orange Creamsicle Fudge?
Absolutely! Wrap pieces individually in plastic wrap, then store them in a freezer-safe bag for up to 3 months. Thaw in the fridge before serving.
❓ Is this fudge suitable for kids?
Yes! It’s a family-friendly treat made without alcohol or artificial flavor boosters. The bright color and creamy texture make it a hit with both kids and adults.
✨ Final Thoughts
This Orange Creamsicle Fudge is the perfect combination of sweet nostalgia and modern simplicity. Each bite delivers a creamy vanilla base swirled with zesty orange flavor—just like the popsicles you loved as a kid. It’s easy to make, fun to serve, and sure to brighten any dessert table.
Whether you’re preparing it for a holiday platter, birthday party, or simply to satisfy your sweet tooth, this no-fail fudge will become a household favorite.
So, grab your white chocolate, a splash of orange extract, and get swirling—your taste buds are in for a treat! 🍊🍦
Orange Creamsicle Fudge
4
servings30
minutes40
minutes300
kcalIngredients
For the Vanilla Layer:
3 cups white chocolate chips
1 (14-ounce) can sweetened condensed milk
2 tablespoons unsalted butter
1 teaspoon vanilla extract
Pinch salt
For the Orange Layer:
3 cups white chocolate chips
1 (14-ounce) can sweetened condensed milk
2 tablespoons unsalted butter
2 teaspoons orange extract
Orange gel food coloring (optional, for a vibrant hue)
Directions
- Prepare the Pan: Line an 8×8 inch baking pan with parchment paper, leaving some overhang on two sides for easy removal.
- Create the Vanilla Layer: In a medium, microwave-safe bowl, combine the white chocolate chips, sweetened condensed milk, and butter for the vanilla layer. Heat in the microwave in 30-second intervals, stirring thoroughly after each, until the mixture is completely smooth and melted. Stir in the vanilla extract and a pinch of salt. Pour this entire mixture into the prepared pan and spread into an even layer.
- Create the Orange Layer: Rinse and dry the bowl. Combine the white chocolate chips, sweetened condensed milk, and butter for the orange layer. Microwave using the same method, heating in 30-second intervals and stirring until smooth. Stir in the orange extract and food coloring, if using, until the color is uniform.
- Swirl and Set: Pour the orange layer evenly over the vanilla layer in the pan. Use a knife or a chopstick to gently swirl the two layers together to create a marbled effect.
- Chill: Cover the pan and refrigerate the fudge for at least 3-4 hours, or until completely firm.
- Slice and Serve: Using the parchment paper overhang, lift the fudge from the pan. Place it on a cutting board and slice into 1-inch squares using a sharp knife. Store in an airtight container in the refrigerator